During my last rapid ideation session, I explored many different tools and learned about their capabilities and limitations. I tested a number of them, compiled a list of my favorites, and sought advice from colleagues, Discord communities, and Facebook groups.
For this rapid ideation session, I have decided to experiment with AI image creation tools to see what kind of results I can achieve. In order to assess my ability to control the output of these tools, I have set a goal for myself: to make a specific change to the Dixie picture (shown below) with the help of AI, as suggested by a colleague at work.
I’ve been tasked with the following (task from my colleague)
“I am not sure what I am looking at is inside, or outside, my challenge to you is to make it clear if this is an interior or exterior.”
Try and make the image look like you’re inside a building.
The process
I recently conducted a rapid ideation session using some AI image creation tools. While these tools are useful, I found that they prefer having a square input, which limits my control over the output. In order to make it easier to work with these tools, I have decided to create a square version of the theme image I mentioned in my previous rapid ideation post
The used image can be seen below:

During my work with AI tools in the past sprint, I have reaffirmed my initial assumption about the rapid growth and implementation of AI in design software. While researching available tools, I discovered that Photoshop and Blender have open source integrations for AI generation. I also came across the possibility of having a model trained specifically for generating seamless textures, which could be extremely useful in the field of 3D animation.
As I explored these tools, I identified the strengths and weaknesses of AI tools in my opinion.
Strengths of AI making art
Artificial intelligence (AI) has a number of strengths that make it an appealing tool for creating art. One of the main advantages of using AI for art is its speed and efficiency. Because AI algorithms can work continuously without getting tired or losing focus, they are able to generate multiple variations of an art piece in a very short amount of time. This allows artists to quickly brainstorm ideas and explore different creative directions, potentially coming up with concepts that they may not have thought of on their own.
Another strength of AI in the realm of art is its ability to analyze and process large amounts of data. This can be particularly useful for tasks such as image recognition, where AI can identify and classify objects or patterns in an image, allowing artists to create more complex and nuanced works.
Finally, AI can also be used to automate certain aspects of the art-making process, freeing up time for artists to focus on more creative and expressive tasks. This can allow artists to be more productive and efficient, enabling them to produce more art in less time.
Weaknesses of AI making art
One weakness of AI art is that it can be challenging to find a balance between allowing the software to make decisions and maintaining control over the output. This can be especially difficult for artists who are not familiar with the tools and techniques used in AI art, as there may be a lack of resources and tutorials available to help them learn and navigate the process.
Another weakness of AI art is the issue of copyright. Some artists have expressed concern that their work may be used or “stolen” by other artists using AI tools, which can lead to feelings of betrayal and frustration. This is especially relevant for artists who have published a large volume of work online under their own name, as their artist name may be used in AI tools to create art in their style. This can potentially lead to the need for artists to consider the risks of publishing their work online, and may discourage them from sharing their art with the world.
I have been exploring Dall-E2 and delving into the field of AI image creation. Through this experience, I have gained a deeper understanding of the tools and techniques mentioned in previous rapid ideation sessions. Here are some additional insights I have gathered about each tool:
Midjourney – One of the most used AI image creation tools, has discord integration and a commited community, control over the output is limited, but many updates have been done while I was using the tool (PAID). But like mentioned in the previous rapid ideation, limited control.
AISEO – Not much control over the output, very similar to Midjourney (PAID)
Dall-E2 – Definitely the best tool I’ve used, also the most expensive. The option to erase parts of your artwork an regenerate it gives you some extra control I fail to see in other tools. Like Midjourney and AISEO you also have the option to upload your own input.
StableDiffusion – Looks very promising, as it is open source. I wasn’t able to get this tool running locally on my pc (which makes it free to use). Because of the code being open source development around StableDiffusion has been very noticeable, definitely something to keep my eye on and perhaps try again in the future.
There are many more tools/integrations I’d like to play around with, but time is limited and during this sprint I had to make choices. That’s why in the previous rapid ideation I did research in the tools and made the choice to work with Dall-E2 for now (because of it’s many features).
The goal I set for the sprint has been achieved, I got the best result by using Dall-E2. Below I’ve visualized my process:
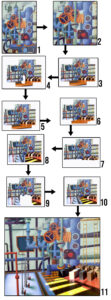
The image above is the result of many steps changing the image over time. I’ve tried creating on overview by displaying the 11 milestone images throughout the process in a flow chart like way above.
Below I’d like to give some context to each individual image.
1. Starting image.
2. Dall-E2 prefers working with square images.
3. An orange floor was added, and a brown ledge, both of them I don’t really like. I am fan of the boxes though.
4. I’ve erased a part of the image I want to regenerate.
5. Regenerating the image did not give the result I want, actually a very similar result I had earlier.
6. I’ve been able to get rid of the brown ledge, but I am stuck with an orange floor that is even more prominent (I don’t like the floor).
7. I’ve decided to erase all the orange parts of the floor so that the AI tool can’t expand on it.
8. This method seemed to work, but there is a clear divid between the 2 generation frames.
9. By masking out the overlap between 2 generation frames I hope to bring the 2 results together.
10. After many tries, I found an AI generation that ties these parts of the images together nicely.
11. Result; factory interior.
Reflection & Conclusion
I am very pleased with the in-depth exploration I have undertaken into the subject of AI art creation. I have gained a lot of knowledge about areas that I did not expect to learn about. One thing that has particularly excited me is StableDiffusion, the free and open-source alternative to Dall-E2. While I am satisfied with Dall-E2 as a tool, it lacks the software integration that StableDiffusion offers with programs such as Blender and Photoshop. Additionally, Dall-E2 can be quite costly to use. The techniques available with both tools seem to be quite similar.
I believe it was a good decision to start with Dall-E2, and now that I have seen the potential of AI design, I am eager to continue studying this topic through my master’s degree. I hope to work with StableDiffusion or any other relevant, free or open-source software solution as I continue to learn about this rapidly-evolving field.
It is clear that the tools for creating AI images are constantly improving, and this is an area of art creation that will undoubtedly shape the industry in the coming years. In fact, it has already begun to have a significant impact, as can be seen in the blog post mentioned below:

Step 2
Using the technique above to work with the theme of RI 2
Quote from this site:
“SCAMPER refers to a series of thought sparkers or provocations which help you to innovate on an existing product, service or situation by looking through different lenses.”
I have conducted several tests and used my previous learning from the Rapid Ideation to inform my decision. I have decided to utilize the SCAMPER method to incorporate the theme of this week into my final output using the workflow outlined above.
The theme for this week is:
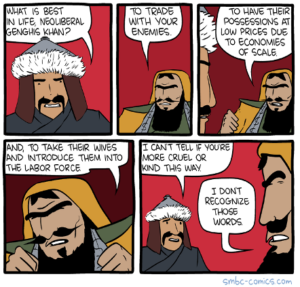
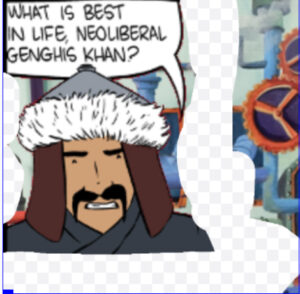
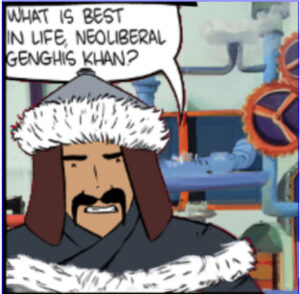
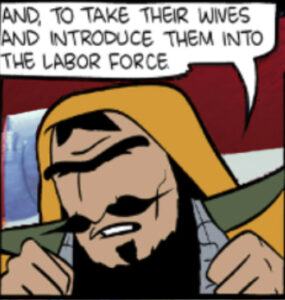
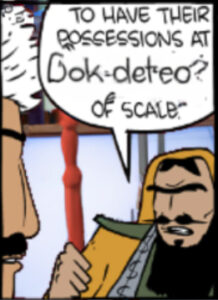
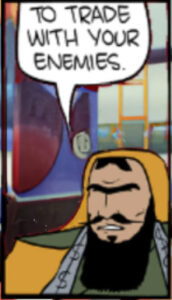
Using the SCAMPER technique, I’ve identified the following goal: I want to explore the potential of combining themes 1 and 2 to create a scene in which the characters are having a conversation within a steampunk factory setting. Through my research, I hope to determine if this is a feasible and effective way to merge these themes.
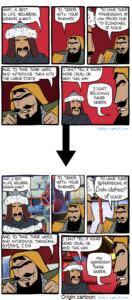
I’ve experimented with different techniques to create the final result you see below. One method I used was remasking, or selectively covering parts of the image. I also attempted text regeneration on two occasions. While I’ve put effort into this project, I haven’t been able to generate text that conveys a meaningful message. However, I did notice that the font style remained consistent in each output during my experimentation with visual text generation.